


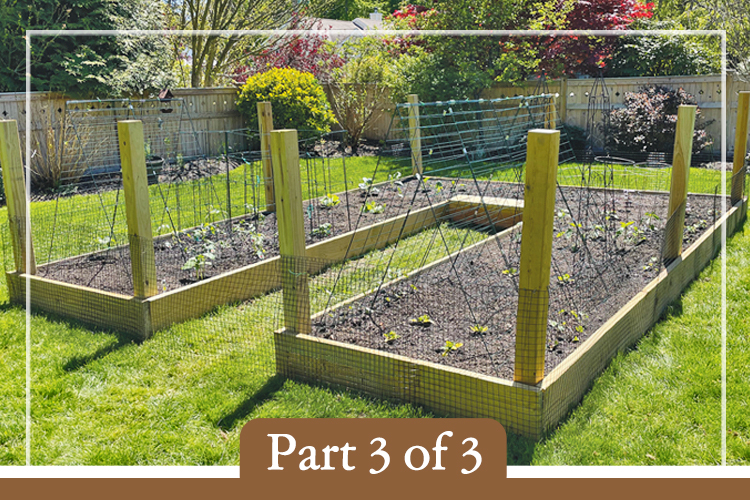
At long last, here’s the final installment of this three-part series, which has been documenting setting up a new garden space. Construction has been completed, plants and seeds have been sown, and now we await the fruit of our labor.
LOCATION : The sprinklers only needed minor adjustments to provide full, proper watering coverage of the entire planting area. The whole bed gets at least six hours of sun per day, and certain areas get more. I’m going to take notes and adjust future planting layouts based on the sun preferences of my crops and where each area of the garden gets more or less sun.
BUILDING MATERIALS : For critter fencing, I chose a black coated-metal fencing with 1” squares that came on a roll, which made for fast and easy installation. It was a breeze to cut with standard wire cutters. To secure the fencing to the bed and posts, we used half-inch U-shaped fasteners. They look a bit like elongated staples from a staple gun and will last longer than regular staples. They’re also a little thicker than staples, to protect against accidentally pulling them out. It was simple to hammer them in with nails. For the time-being, I have an extra piece of fencing serving as a gate until I decide how I want the gate to look. I found trellises to support the cucumber and sweet potatoes on Amazon. There’s a wide variety of sizes, shapes, and materials. I chose a metal option that maximized vertical height while minimizing ground area, so there was little to no wasted space.
GROW-GOALS : After filling the new bed with topsoil, I top-dressed with perlite to prevent compaction and I added a bit of broad-spectrum organic fertilizer. Top soil should not need any supplements when it’s new, but due to global soil depletion, it’s hard to be certain how nutrient-rich top soil is without getting it tested. I did not get mine tested. The fertilizer I chose is slow-release, so it’ll continue to feed the plants for a while. I again used plumb lines of string to create straight, evenly spaced rows for planting. I arranged the plants and seeds based on expected mature height, shortest in the front, defined as closest angle to the sun. The cucumber and sweet potato trellises went in the back, since those will eventually be a solid mass of vine and fruit. All in, my crops for this year are: radish, carrot, spinach, green bean, broccoli, scallions, sweet potato, zucchini, tomato, several varieties of hot pepper, cucumber, cucamelon and, new this year, luffa. If all goes according to plan, I’ll have home-grown sponges to gift this holiday season. Pro tip: To save space, I planted the spinach underneath the trellises. Spinach is a cool weather crop that will cycle out by the time the vines reach the top of the trellis. Next year, I’ll also do lettuce under the trellises.
As of writing this article, the garden was planted three and a half weeks ago. In that time, we’ve had one day of natural rain and lots of dry, sunny days, so I’ve been hand-watering at least once a day, in addition to the sprinkler system. Top soil doesn’t retain water as well as potting soil, so supplemental watering until plants are established and rain is regular will minimize plant stress and support seed germination, which helps to ensure a bountiful crop.
I hope you’ve enjoyed coming on this journey with me, and perhaps were able to take a few bits of wisdom and apply them to your existing garden, or to your plans for a new one. If you do a DIY garden project, I’d love to hear from you and see your photos! My contact information is in the byline. Happy summer!


 20 lucky winners will win $500 each in prizes totaling $10,000.